Alright, now that we have a Kubernetes cluster running (previous post), we have to install some applications 🚀!
I decided to start with Jellyfin, an open source Media System. It is a good first project since it requires the configuration of a simple deployment, a persistent volume, and a load balancer.
The main configuration is pasted at the end of the article, and a step-by-step guide is presented below.
Volumes
The main deployment contains a few sections, the following defined the Volumes where the media files (movies, series, albums, etc.) are stored. For my current setup—which consists of three VMs running on a macOS host—I mounted the folder containing my media (on the host machine) to all the VMs. All the paths shown in volumePaths are subdirectories of the shared folder, and the name associated with a mountPath corresponds to a volume.
volumeMounts:
  - mountPath: "/Movies"
    readOnly: false
    name: nas
    subPath: Movies
  - mountPath: "/Shows"
    readOnly: false
    name: nas
    subPath: Shows
  - mountPath: "/config"
    readOnly: false
    name: nas
    subPath: config
  - mountPath: "/cache"
    readOnly: false
    name: nas
    subPath: cache
volumes:
  - name: nas
    persistentVolumeClaim:
      claimName: pvc-jellyfin-nas
Notes
- to mount a folder in a Linux VM, we must install the
vmware-toolspackage (pacman -S open-vm-tools), setup a systemd service, and add an entry to fstab (more details in VMware/Install Arch Linux as a guest). - the volume can be a folder, a separate disk, or be full NAS server.
Kubernetes Persistent Volume and Claim
For the drive to be accessible on the cluster pods, we need to create a Persistent Volume (PV) and a persistent Volume Claim (PVC), again, the name (nas) has to match. You can see, on the PV definition that we set hostPath since we are making a local folder (/mnt/nas/jellyfin) available on the cluster.
Those two resources are pretty simple and self explanatory:
apiVersion: v1
kind: PersistentVolume
metadata:
  name: pv-jellyfin-nas
  labels:
    type: local
spec:
  storageClassName: manual
  capacity:
    storage: 10Gi
  accessModes:
    - ReadWriteMany
  hostPath:
    path: "/mnt/nas/jellyfin"
and the claim:
apiVersion: v1
kind: PersistentVolumeClaim
metadata:
  name: pvc-jellyfin-nas
  namespace: jellyfin
spec:
  storageClassName: manual
  accessModes:
    - ReadWriteMany
  resources:
    requests:
      storage: 10Gi
the option ReadWriteMany means that the volume can be mounted as read-write by many nodes. The size of the request has to match the volume capacity so they can be assigned!
Retain Configuration
For the Jellyfin server to retain its configuration when the pod restarts—or the cluster is shutdown—we must create and assigned a /config folder (shown above). Otherwise, the folder will be created on the pod, and the settings will be lost when the pod is shutdown. Similarly, the cache/ folder where metadata can be saved.
On my host machine, the jellyfin folder that is mounted to the VMs contains:
> ls
Movies/ Shows/  cache/  config/
LoadBalancer
By default, the server will only be accessible through a ClusterIP, which is only accessible from within the cluster. Kubernetes offer two other types of service to access applications:
NodePort: allows for remote access to the cluster node where the application is runningLoadBalancer: allows for remote access to the main node and redirect the traffic internally to the correctNodePort
If you are looking for a great video explaining how Kubernetes Services work, I recommend Kubernetes Services explained from TechWorld with Nana.
For our app, we could use a NodePort and making sure our pod is always running on the same node (by adjusting affinity) to have a static IP. But in general, it is recommended to set up a LoadBalancer and only use NodePort for testing during development. Important to point out that when many apps are running on a cloud cluster, it might become more cost effective to setup a NGINX Ingress Controller.
apiVersion: v1
kind: Service
metadata:
  labels:
    app: jellyfin
  name: jellyfin
  namespace: jellyfin
spec:
  ports:
  - name: web-tcp
    port: 8096
    protocol: TCP
    targetPort: 8096
    nodePort: 30000
  - name: web-udp
    port: 8096
    protocol: UDP
    targetPort: 8096
    nodePort: 30001
  selector:
    app: jellyfin
  type: LoadBalancer
    protocol: UDP
    targetPort: 8096
    nodePort: 30001
  selector:
    app: jellyfin
Applying to the cluster and accessing the server
I saved the main deployment file to deployment.yaml, the pv.yaml, and pvc.yaml in a common jellyfin/ directory. The configuration can be applied to the Kubernetes cluster using kubectl apply -f jellyfin/. Once the pod is running, the server should be accessible at the port specify in the LoadBalancer configuration.
First we can see that the main server is running:
> kubectl get pods -n jellyfin
NAME                        READY   STATUS    RESTARTS      AGE
jellyfin-669cbb7dff-mgjwm   1/1     Running   5 (25m ago)   21d
and that the LoadBalancer is redirecting the traffic:
> kubectl get svc -n jellyfin
NAME       TYPE           CLUSTER-IP     EXTERNAL-IP   PORT(S)                         AGE
jellyfin   LoadBalancer   10.96.72.180   <pending>     8096:30000/TCP,8096:30001/UDP   22d
as noted above, the TCP port is used for the web interface, and the UDP for the data transfer. I don’t have an external DNS setup at the moment (EXTERNAL-IP <pending> state), but this could be use to redirect an hostname, e.g. http://homelab.philippemiron.com/jellyfin, directly to the application.
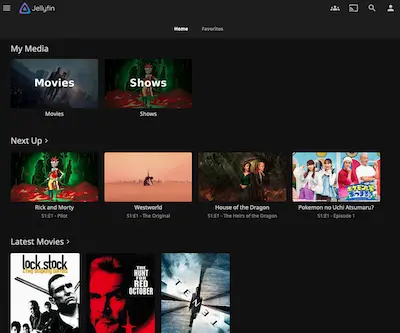
To connect to our interface, we simply navigate to KUBERNETES_CLUSTER_IP:30000 on a device on the same network. After completing the guided configuration (only on first login!), you should have access to your media server.
Note: The naming schemes and directories organization have to follow a predefined pattern to be automatically recognized by Jellyfin. See more details on the documentation (Movies and Shows).
Bonus
If like myself you have a Samsung TV, there is a last step. Since the Jellyfin app is not available in Samsung’s Smart Hub, we must manually installed the application (GitHub jellyfin/jellyfin-tizen).
First, the TV has to be put in Developer’s mode, this is done by:
- Open the Smart Hub.
- In the “Apps” panel, enter “12345”.
- Switch Developer mode to “On”.
- Enter the IP of the computer that you will used to connect to the TV.
Then, we have permission to push the Jellyfin app to the TV from the specified IP address. Tim Georift built a Docker image (GitHub Georift/install-jellyfin-tizen) to easily pull and install the latest app (GitHub jellyfin/jellyfin-tizen) to a TV.
> docker run --rm georift/install-jellyfin-tizen <samsung tv ip>
Deployment configuration
---
apiVersion: apps/v1
kind: Deployment
metadata:
  labels:
    app: jellyfin
    app.kubernetes.io/instance: jellyfin
    app.kubernetes.io/name: jellyfin
  name: jellyfin
  namespace: jellyfin
spec:
  replicas: 1
  selector:
    matchLabels:
      app: jellyfin
  template:
    metadata:
      labels:
        app: jellyfin
        app.kubernetes.io/name: jellyfin
    spec:
      containers:
      - image: jellyfin/jellyfin
        imagePullPolicy: Always
        name: jellyfin
        ports:
        - containerPort: 8096
          name: web
          protocol: TCP
        env:
        - name: TZ
          value: "America/New York"
        volumeMounts:
        - mountPath: "/Movies"
          readOnly: false
          name: nas
          subPath: Movies
        - mountPath: "/Shows"
          readOnly: false
          name: nas
          subPath: Shows
        - mountPath: "/config"
          readOnly: false
          name: nas
          subPath: config
        - mountPath: "/cache"
          readOnly: false
          name: nas
          subPath: cache
      volumes:
        - name: nas
          persistentVolumeClaim:
            claimName: pvc-jellyfin-nas